|
Hello ARCers!!
I
check this site frequently, and I figured it was about time I posted some of my
work! This is my most recent project, Revell/Germany's 90s offering of the
Concorde in 1/144. A buddy of mine gave the kit to me close to 3 years ago
expecting me to finish it that summer. After an extensive break from
modelling (mostly out of laziness) I picked up the kit again and finished it for
him this summer. What was great was the look on his face when I finished
it and showed up to his house with it, not only was he not expecting it to be
finished, but he didn't expect me to throw it onto a base!
Click on
images below to see larger images
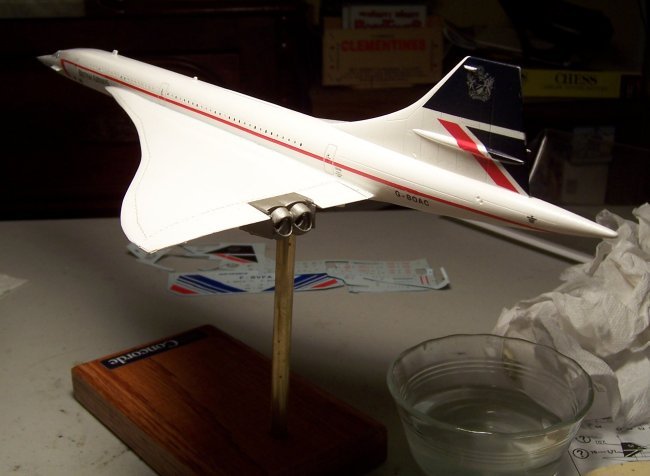
It's unfortunate that this kit is
one of the few Concorde offerings out there because it was a true pain to build.
I had massive problems with seams especially around where the root chord meets
with the fuselage and the where the engines attach to the wings. I spent
the majority of my time on the seams on this kit. It could also be the
fact that the last model I built was the 'shake and bake' Revell 1/48th F-15E...
The kit came with a lousy plastic
nose pitot tube (is it a pitot tube?), so I stole a sewing needle from my mom's
sewing kit.
The paint is Testors gloss paint
straight from the can, all clear coats were done with Future Floor Polish from
the bottle into my Badger 350. Dave requested a gloss finish (which I
hate, it gives it a 'display model' look rather than a 'real airplane' look), so
no dullcoats were applied.
The next tricky part was the
decals. I only have one airliner kit under my belt, the newer Hasegawa 777
in American Airlines colors, which was a snap. Even the decals on the
Hasegawa kit were easy to deal with and lined up well. This kit was a
nightmare, the red stripe down the fuselage was most certainly the biggest pain,
I was lucky that I somehow ended up with 2 sheets of decals for I messed the old
decals up numerous times. The tail insignia was another huge pain,
especially with the antennas on each side. In the end I shaved each antenna
off and replaced them with sheet plastic after the decals had settled.
Frequently the decals were the incorrect size and needed to be shaped down with
some cutting. The kits directions also gave the wrong places to put the
decals, so I had to use reference material for the majority of the decals.
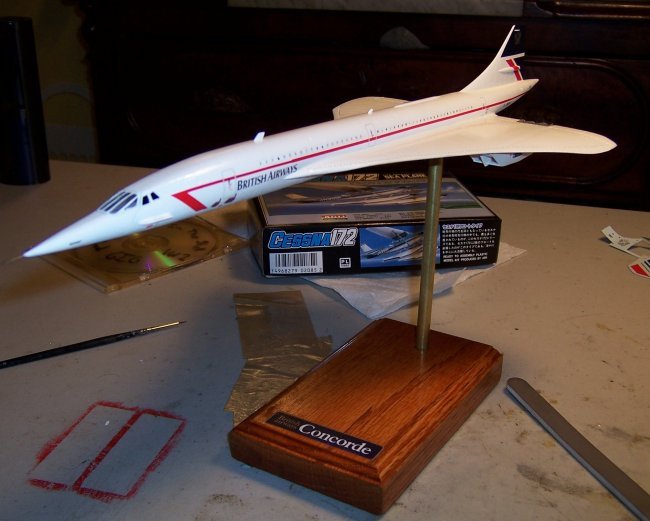
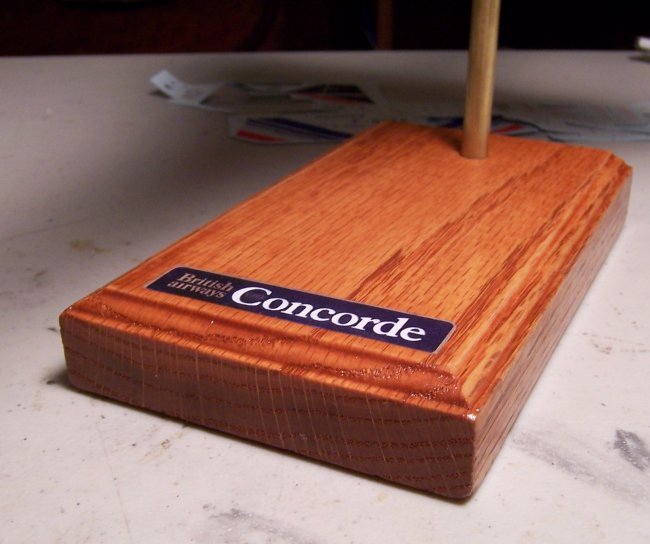
I was marching into
uncharted territory with the base. The wood is a piece of Oak door trim
that I bought at Home Depot that I sanded, stained and sealed (something I've
never done before), however I was very happy with the results. The BA
Concorde logo is a picture of the luggage tags used when the plane was in
service around the late '80s taken from an Ebay auction. It's simply
printer paper Elmers glued to the base. A quick coat of future gives the logo a
glossy finish that somewhat matches the base's polyurethane finish. This
was my first time building a 'model on a stick' and I absolutely love the look.
I'll be certain to try the same thing in the future!
Although it was a tricky build,
I'm very happy with the results, and it's unfortunate that I have to give the
model away!
Dave
|