|
This
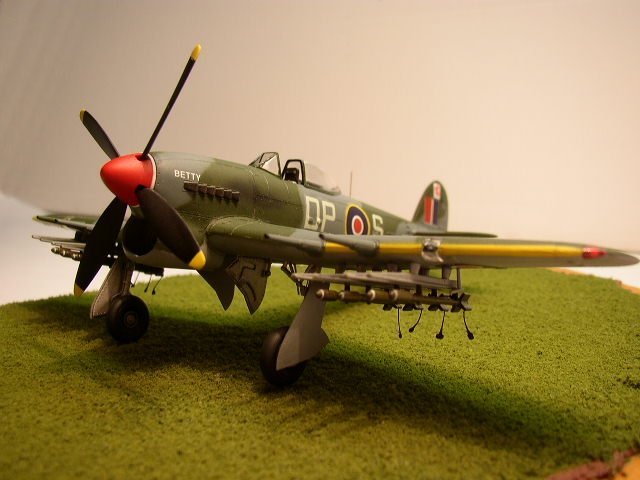
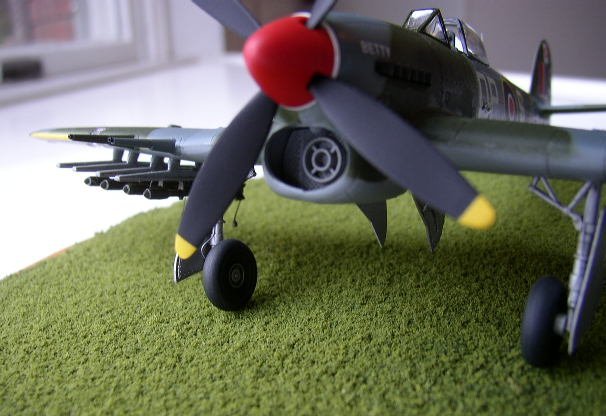
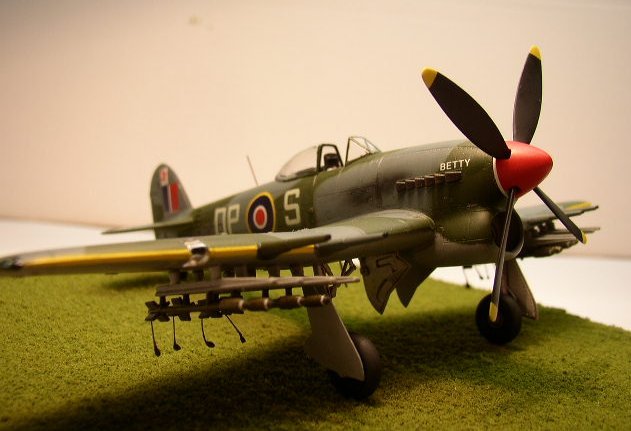
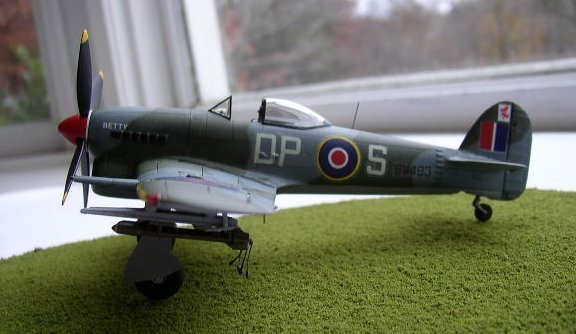
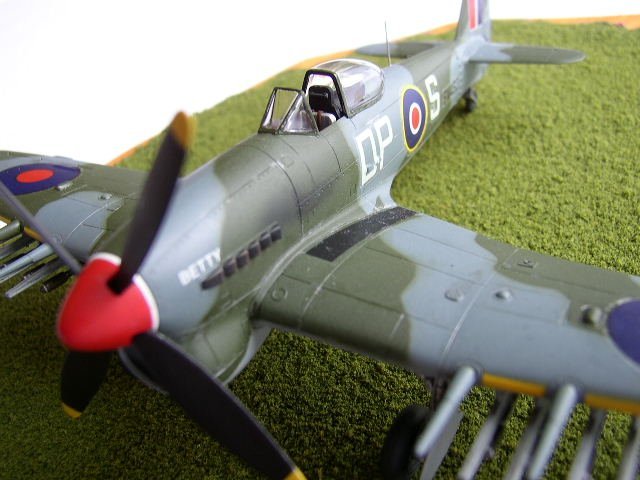
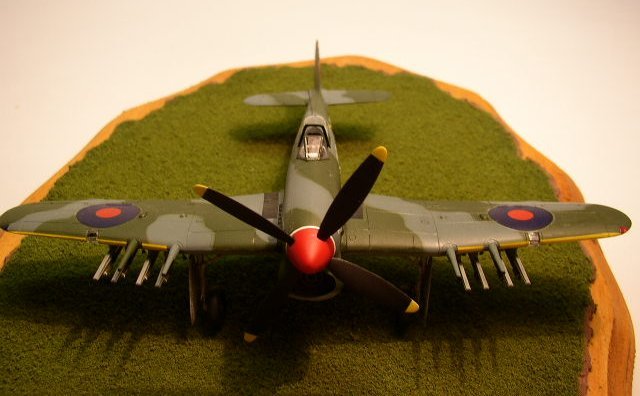
is my Academy 1/72 Hawker Typhoon 1B.
Construction
The
kit went together very well with some scratchbuilding done to enhance the nice
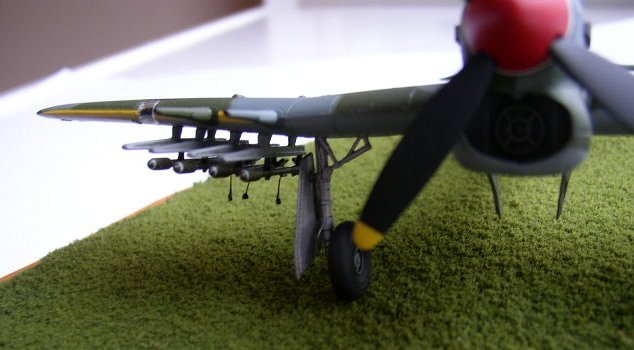
detail of the model. Hydraulic
lines for the main landing gear was made from beading wire with the lead foil
being used for the retaining straps. The
seat harness was also made from lead foil, which was painted using Model Master
Leather and silver for the buckles. The
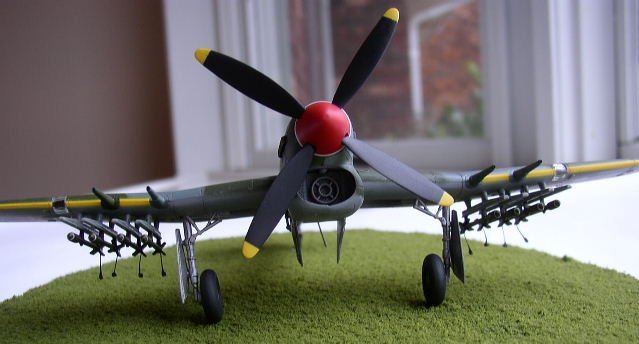
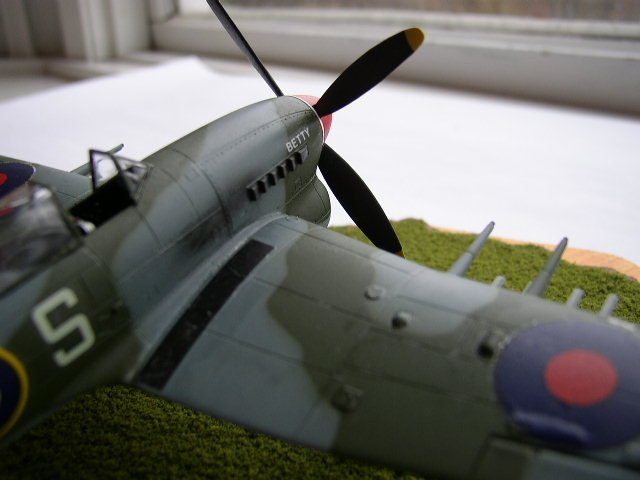
cannon barrels were drilled out using my mini-drill and the antennas for the
fuselage topside and underside were made from different diameters of brass rod.
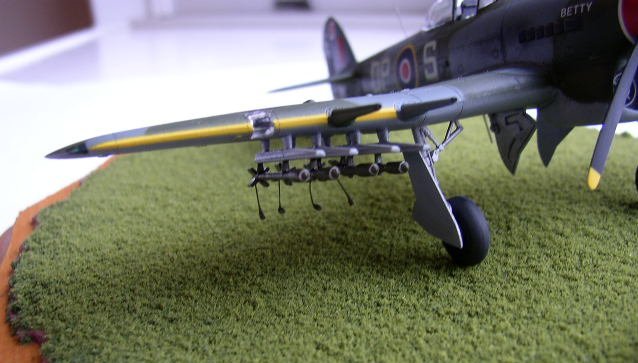
The
“pigtails” hanging off the rocket ends were cut from a
piece of plastic netting that was
used to cover an area of our yard that we had graded and seeded
earlier this year. They were all attached to one another so all I did
was cut them into small pieces, trim them a little with a small scissors, and
they were ready for painting and gluing. If anyone wants some, just let me
know! I was originally planning to use cut small pieces of thread and dip
the ends in Super Glue, which I think would work fine as well.
Click on
images below to see larger images
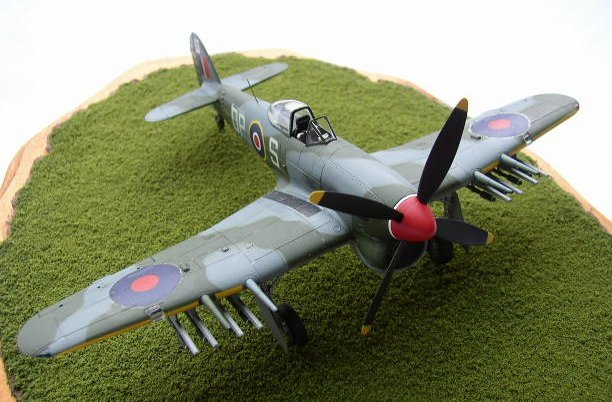
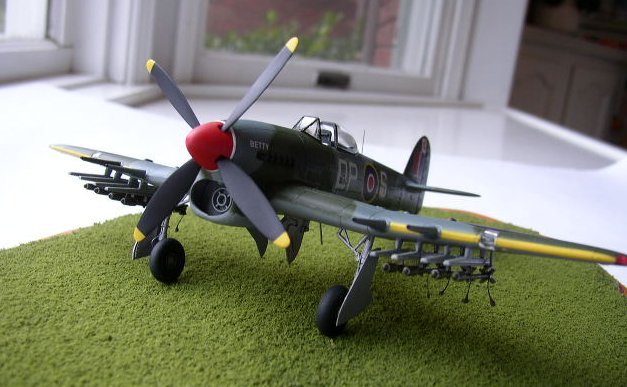
Painting
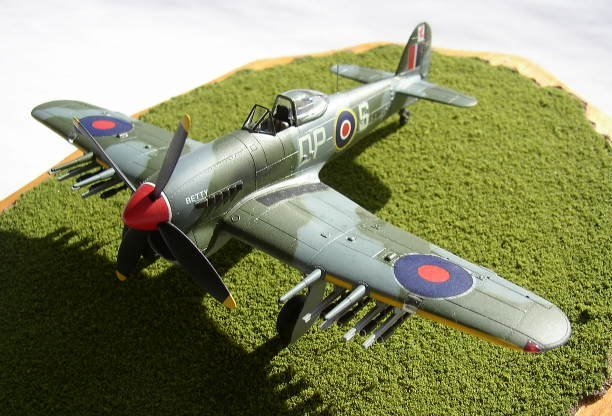
Model
Master Paints were used for the exterior colors of Ocean Gray, Dark Green and
Medium Sea Gray. Primer was
airbrushed on the model first followed by spraying on the
medium sea gray underside. The
underside was then masked off and the topside was sprayed
ocean gray overall followed by some fading using ocean
gray mixed with flat white.
The instructions were expanded to 1/72 scale using my home copier and the
outlines for the dark green color were
then cut out and laid over drafting tape. I
then drew the outline on the drafting tape, cut the piece, and used thread to
run along the edge of the outline under the tape so that the edge would be
lifted slightly off the edge of the model to provide a softer edge when spraying
on the dark green.
After masking, the dark green was
sprayed on followed again by some light shading of that color mixed with flat
white.
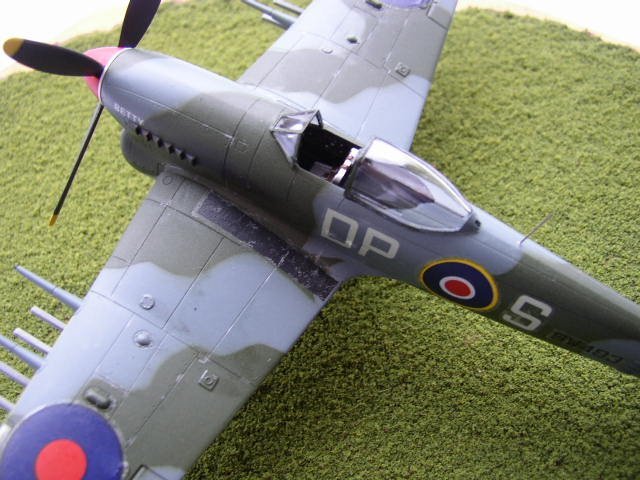
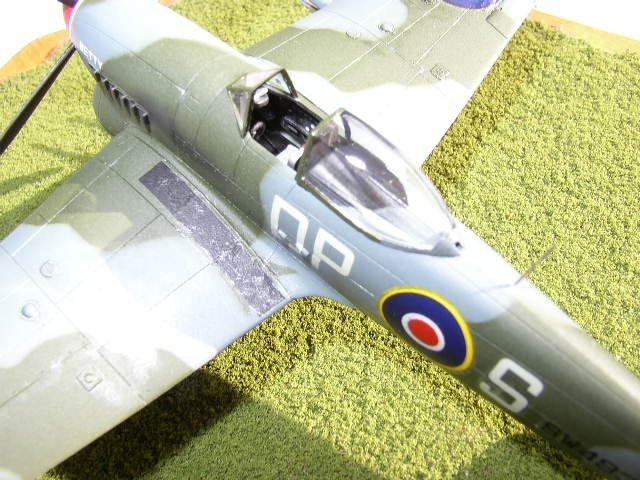
Although
the instructions call for the cockpit interior and landing gear areas to be
painted gray green and medium sea gray respectively, my references indicated
otherwise, so I went with the references. Accordingly,
the cockpit was painted flat black overall as was the area on the upper fuselage
immediately behind the cockpit, with the seat being painted aluminum. The cockpit
black was drybrushed using Humbrol Panzer Gray.
The landing gear wells and the insides of the strut covers and gear well
doors were also painted aluminum.
| The
author Chris Thomas, who has written a number of books on the Typhoon and
Tempest, was kind enough to send me an outstanding color photograph
showing that the interior of the gear wheel doors were indeed an aluminum
shade, in addition to showing the double ring around the rocket tips as
well as the width of the wing leading-edge yellow stripe being narrower
than I had originally thought. The
picture can be seen on the right. |
Click on
image below to see larger image
|
 |
|
Above
photo copyrighted by the RCAF
|
|
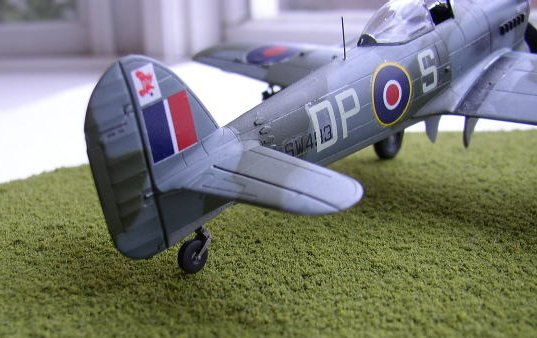
In
1/72 scale the red rocket ring around the tip was too small to paint
for me so I just painted the outer one, albeit a little further back than
the picture shows. Chris also informed me that the two port cannon
fairings as well as the inboard starboard one were painted ocean gray with
the ocean gray also being applied to the underside of the fairings.
The fairing for the outboard starboard fairing was painted dark green,
again with the dark green being applied to the underside of the fairing.
Weathering
& Decaling
For
weathering, in addition fading the base colors, I applied an oil wash of Ivory
Black to the panel lines using a fine-tipped brush. Since I didn’t want the
wash to be too heavy on the topside, I just used the jar of turpenoid that I
have for cleaning out my brushes, which naturally contains some oil residue in
it, and applied that to those panel lines.
The excess was wiped off in the direction of the airflow using Q-Tips.
Paint chipping was done with a silver pencil and I used black pastel
chalk along with some panzer gray for
the exhaust staining. The exhaust
stacks were painted flat black, drybrushed with
panzer gray and followed up with a drybrushing of rust.
I
used the kit decals which worked out okay.
Some so-called “silvering” of the roundels on the wing topsides
occurred despite my efforts to keep that from happening…oh well.
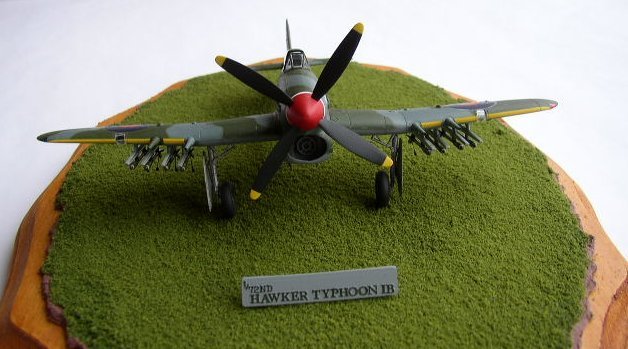
The
Base
The
base was obtained from a local craft store (Michael's) for $1.50 or so which I
stained with two coats of leftover deck stain & sealer.
I mixed Celluclay with water (naturally), then colored it by mixing
in acrylic dark brown craft paint, which was then spread on the
base. After letting it dry
completely (2 days), I mixed Elmer's Glue with a little water (can't allow
it to get too runny), spread that over the groundwork, and sprinkled Woodland
Scenics "Turf" on the glue until the proper coverage was achieved.
I then blew off the excess until everything stayed in place.
After letting it dry overnight, I sprayed a light coat of Testors Dullcote over
it to make sure the "grass" stayed in place and let
it dry for around 6 hours or so before taking pictures. Yeah, pretty
simple.
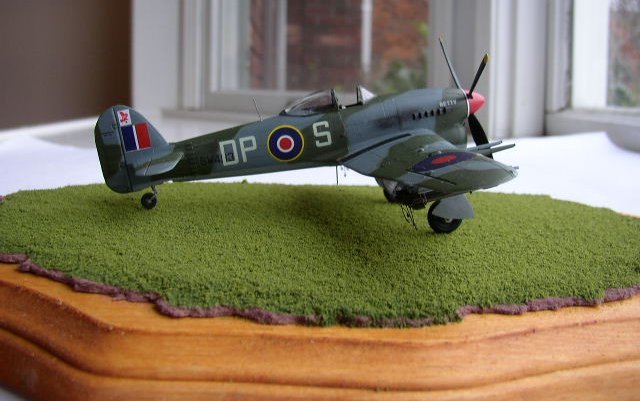
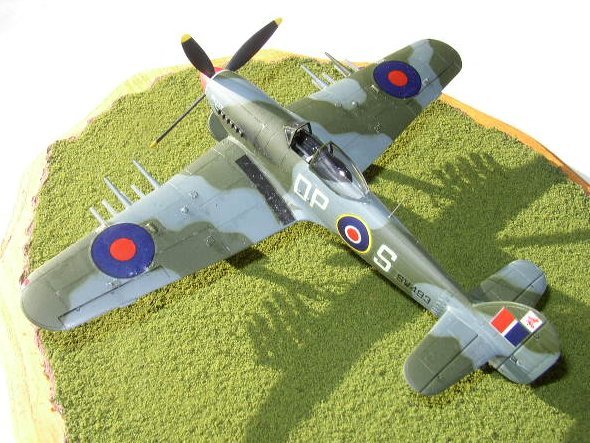
The
model represents a machine from the 193rd Squadron, 146th
Wing, 2nd Tactical Air Force during 1944-45.
Happy
Modeling!
Rick
References:
-
Camouflage
& Markings: Hawker Tornado, Typhoon & Tempest RAF Northern Europe
1936 - 1945, R.C. Jones. R.L. Ward, Ducimus Books Limited
-
The
Illustrated Directory of Fighting AIrcraft of World War II, Bill Gunston,
Salamandar Books Ltd. 1988
-
The
Typhoon and the Tempest story, Chris Thomas, Arms & Armour, 1988
Click on
images below to see larger images
|
|