|
Here
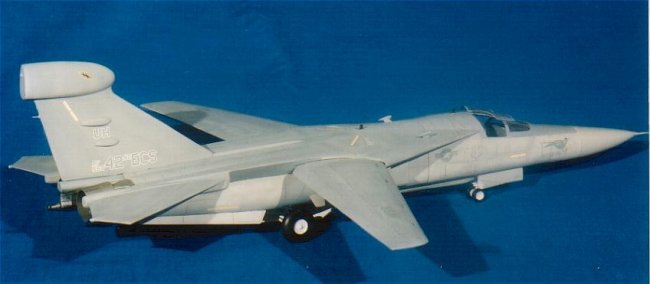
is my second Zhengdefu kit, an EF-111. Basically if you saw my previous article
on Zhengdefu’s FB-111 (which I converted to an F-111G on ARC) then you’ll
know what to expect in terms of fit and build.
Zhengdefu’s
kit of the EF-111 required a bit of work as you might expect; major areas of
concern were the wings, canopy, and this time round the tail.
|
Click on
images below to see larger images
|
|

|

|

|
| I
replaced the kit canopy, as it was cloudy in appearance. The new canopy
was vac formed and displayed in the open positioned. The wings also had an
awful seam line running through them, this seems to be a feature with
Zhengdefu’s family of F-111 kits. |
|
To
get rid of this feature the seam lines were sanded down and re-scribed. A major
feature of the EF-111 is the tail. The tail supplied with the kit was noticeably
warped. To straighten the tail it was dipped into warm (not boiling) water for a
few seconds, just long enough for it to become malleable. I was unable to
straighten it completely, so if you look hard enough you just might notice a
slight kink.
Once
again I replaced the kit decals with an aftermarket set. I won’t
describe the kit decals as you can see for yourself what the kit decals
look like. |
|
Click on
images below to see larger images
|
 |
|
I
used Xtradecal’s X006-48 decal sheet on my EF-111. The decals are thin and
went on with no problems.
This
particular EF-111”Let em eat crow” was based at RAF Upper Heyford in 1989
and was the last aircraft to be adorned with any form of nose art. Incidentally
this decal sheet also has decals for an A-10 and an F-111F.
The
model was painted as described by the decal instructions of dark compass grey
& light grey. I weathered the aircraft slightly and accentuated panel lines
with a .03mm mechanical pencil. The whole kit was then finished off with several
coats of Testor’s Dullcoat.
Although
Zhengdefu’s EF-111 suffers from poor fit and general quality, but the overall
shape/appearance of the kit isn’t that bad at all once you fill in the gaps
and apply a coat of paint.
Lawrence
|