|
This
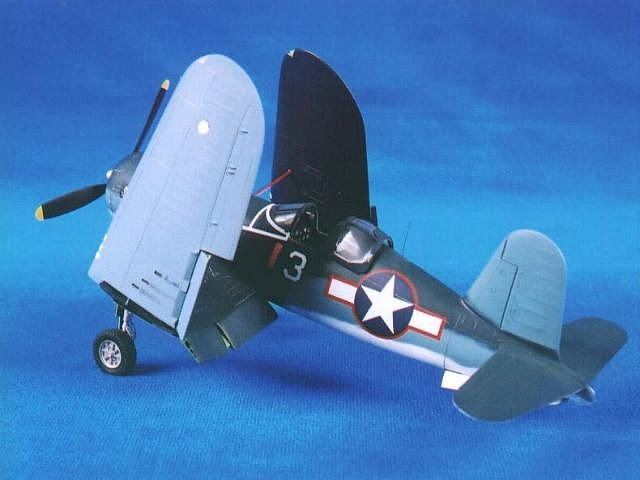
is Hobbycraft’s much maligned 1/48th scale F4U-1a that I built when
the kit first came out about 6 years ago. I really don’t understand what all
the fuss is about. I thought it was a decent kit. It may be a little chubby
around the middle, but when it’s done it looks like a Corsair, and that to me
is all that matters. When I read an article or when someone tells me a kit is no
good, it becomes a challenge to me of sorts, to build it and prove that a
“bad” kit can indeed be built into a nice model. This is in fact the 3rd
kit of Hobbycraft’s Corsair I built. I also did a birdcage, and used
Falcon’s vacuform conversion set to build an F2G. Other than some fiddling
with the flaps to get them to fit okay, I thought the kit went together really
well. I went one step further and folded the wings on mine. I used bits and
pieces of the wing fold parts from a Verlinden Corsair Update set that a fellow
modeler didn’t want to use, and modified it for use on the Hobbycraft kit.
Using the ribs and hinge assembly, I soldered the pieces together, rather than
trusting Superglue. The only thing supporting the wings to the root is a small
piece of photo etch, and the red plastic rod supports, so I wanted it strong. I
used the forward halves of the photo etch ribs, and built up the rear half out
of .005 sheet and plastic strip to match the contours of the PE pieces. Plastic
rod was used for the flap actuators on the outboard wing folds, and wire used
for the hydraulic lines. These were all epoxied into place inside the wing
halves, and also contribute to a little structural strength. The flaps were
corrected and detail added, and installed in the dropped position. The landing
gear wells were detailed, as were the landing gear struts themselves. The kit
engine plug was discarded in favor of a full two row R2800 from Hi-Tech,
appropriately detailed with wire looms and pushrods. The cockpit was corrected,
dumping the kit floor for a scratchbuilt interior without the floor, and
stringers and longerons were added to simulate the inside of the fuselage
structure. The Instrument panel is Reheat Gauges, det in place over the kit
panel. Setting solvent was used to get the decals to conform to the kit gauges,
and it gave a nice 3D effect. The gunsight was scratchbuilt, as was the seat and
control stick, and the rudder pedals and foot rests. Wingtip lights are CA,
gradually built up, sanded and polished to shape, as are the Formation Assembly
lights and landing lights. The Tail wheel was corrected and detialed, and
Aeromaster decals and Floquil Military Colors round out the finish. The base it
sits on, I made with label paper and I did my own carrier deck pattern and
printed it on an ink jet printer. The model garnered a Second Place at Syrcon in
the 1/48th Allied class (out of over 60 entries) so I was pleased
with the outcome. It was satisfying to me to have several people ask me if it
was the Tamiya Corsair, and to see the look on their faces when I told them it
was the Hobbycraft.
About
the builder:
My
name is Mike Robinson, and I have been in the hobby for about 40 some years,
starting when I was 5 years old and my first model ever was a Hawk Corsair in
1/48th scale that my Dad helped me build. My main interests are World
War 1, Pre War US Navy, and Navy aviation in general. I live in upstate New York
near Rochester, and am a member of the Rochester Historical Scale Model
Association, a chapter of IPMS. I am 45 years old, single, and work for Xerox as
a Field Engineer. My other interests are motorcycles, and I put about 10
thousand miles a year on my Honda Goldwing.
I’d
like to thank Tom Johnson of Rochester New York for the photography.
Mike
|
|