|
Okay guys I know when I make this next statement you are all going to laugh and
say what a weird modeler I am, but I'm going to say it anyway. I'm
31-years-old, I've been building models since I was 5 and this is the first
P-51 model I have ever built. That's right I've been building model
airplanes for 26 years and I just now got around to building a Mustang.
There is probably an X-File on me.
I discovered WarbirdAeroPress decals after
reading a short review of one of their sheets on Hyperscale
(sorry, Steve). After reading the review I immediately went to Scott
Germain's WarbirdAeroPress.com
to check out what else he had to offer. I was pleased to see that Scott's
decals (and some resin parts) cover subjects that have long been ignored,
Warbird racing planes!
I'm not going waste time giving you guys a
history lesson on Bob Hoover and his Old Yeller Mustang because we all know who
he is, right?
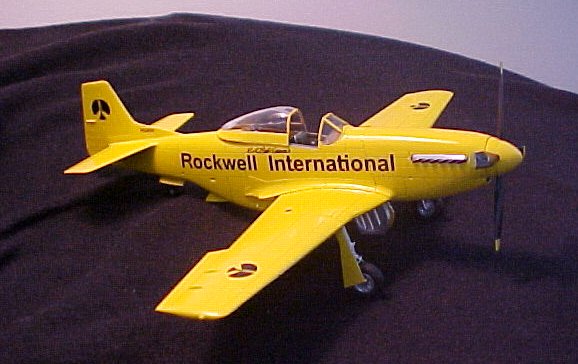
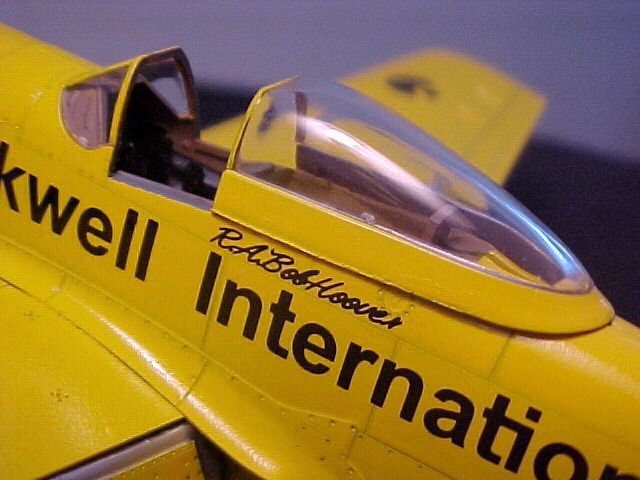
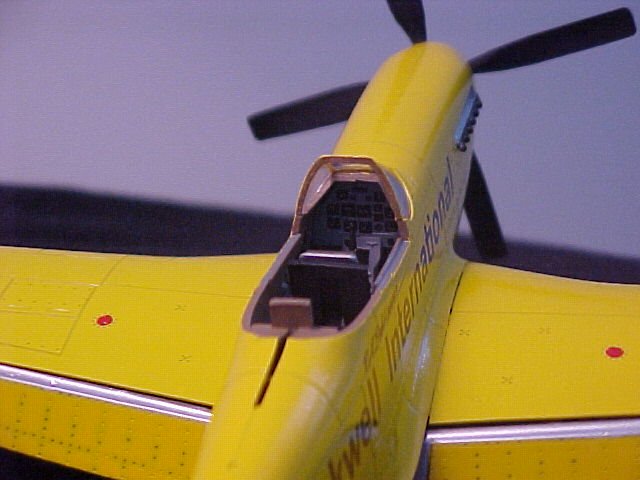
I ordered five sheets from Scott including the
Bob Hoover Rockwell International decals you see applied to this 1/48th Tamiya
F-51D 'Korean War' kit. Scott suggests using this kit because it includes
the non-cuffed prop and blunt nosed spinner. I had already chosen the
Tamiya kit because you have the option of lowering the flaps. I've never
see a picture of a parked P-51 that didn't have the flaps lowered!
I also ordered the decals for Bob's Evergreen Mustang but since I saw Bob
perform in the Rockwell P-51 at Oshkosh '82 at the age of 11, I did this
version. It was the sentimental choice.
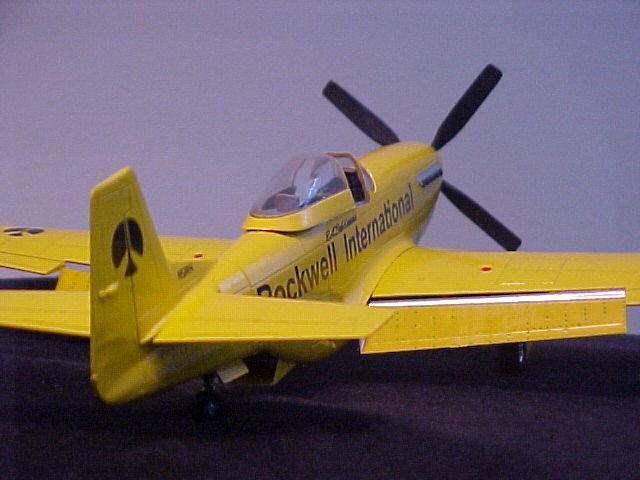
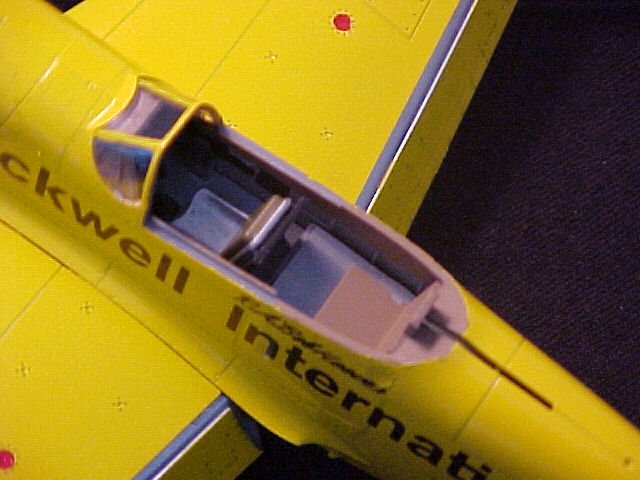
The Tamiya kit does require a few
modifications. The most obvious would be the elimination of the machine
guns ports in the leading edges and the filling of the holes under the wings
where the spent shell casings are ejected. The cockpit must also be
modified, using the instructions included with the sheet as a guide the cockpit
was modified as follows: Cut the radio equipment out of the middle of part A17,
this leaves you with the cockpit itself and the upper portion of the radiator
scoop. Use the radio equipment to trace a new styrene floorboard and glue
the new floorboard in the radio equipment's place. After building and
painting of the cockpit was complete I glued the entire assembly to the right
fuselage half. At this point I built the rear seat with styrene.
During this process I repeatedly dry fitted the left fuselage half to check the
fit of the new seat. I did not have any reference photos of to go by I
just used my imagination and the brief description on the decal sheet
instructions. I can tell you that on Bob's P-51 the rear seat headrest is
attached to the seat, it does not slide back with the canopy.
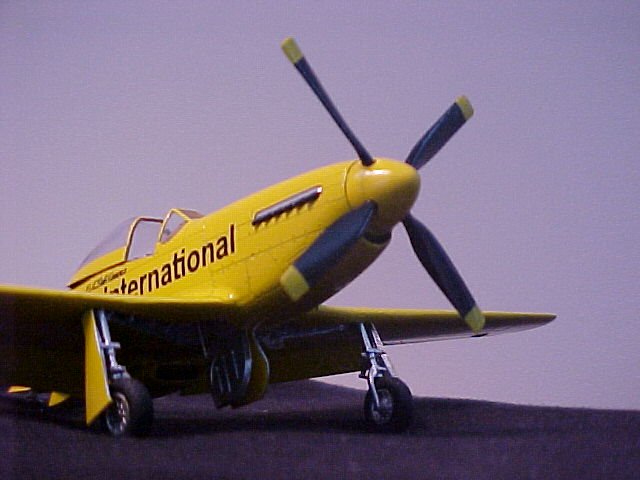
The rest was easy. I sprayed the
model with a couple coats of Testors "rattle can" Yellow (no FS
numbers in the instructions). I applied Future to the entire model before
decaling. Using Microscale Mirco Set and Micro Sol the decals went on
beautifully, they adhere very well. I applied another coat of Future and
my first P-51 was finished! The only things I left to do is install
various civilian radio and nav antennas and paint the walkways on the wings.
Now that the Rockwell version is finished
its time to get another kit and start on the Evergreen version. Now where
did I put my Squadron Mail Order Catalog?
Stephen
|