|
One of the most
important things about scale modeling is capturing a moment in history, and a
moment that we will all remember is September 11th, and the following revenge of
our carrier airpower on the home of the Terrorist. As soon as I saw CAM's
decal sheet for VF-41 I knew I had to build it as soon as possible as a tribute
to the brave men and woman of our Armed Forces and the victims of 9-11.
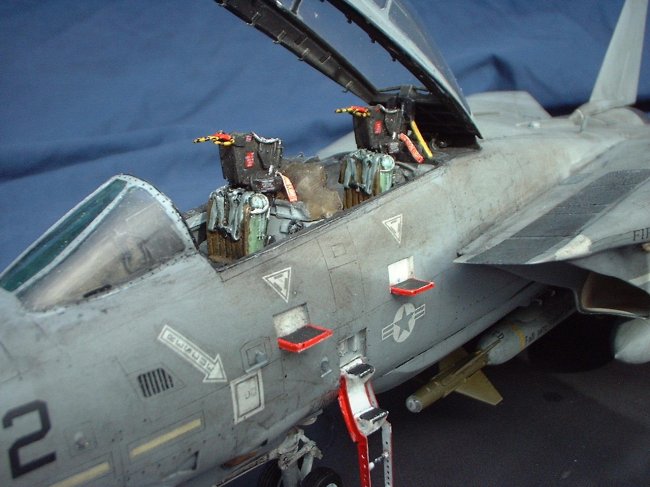
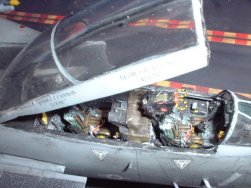
Picking up where I left off on my review of the Black Box cockpit here on ARC
(ARC Review section under Black Box), the cockpit was joined to the fuselage halves and
then joined. Like some of the of the other Hasegawa kits, the canopy in the F-14
kits have a seam line running down the middle
that needs to be removed. In my one year of modeling experience I had never
dealt with anything like this and the thought of sanding the clear parts scared
me.
A friend of mine (thanks Earl!) advised me to order some Micro Mark and Novus
plastic polishing kits http://www.dxmarket.com/micromark/products/80939.html
http://www.dxmarket.com/micromark/products/82462.html
to take care of any clear part problems, and WOW they worked great. If clear
parts scare you too, then get these products it will make your life easier. You
sand the seam off using progressively smoother sand paper (800-12000 grit) that
the Micro Mark kit provides. Then you polish things out using all three of the
Novus pastes, I also found that the Novus stuff makes non-scratched canopies
look even better too (cleans them up and makes them shine). If you are still
using Future on your canopies, STOP! Use the Novus creams instead, they will
never yellow, ever. Future is still a good product for painting though. The
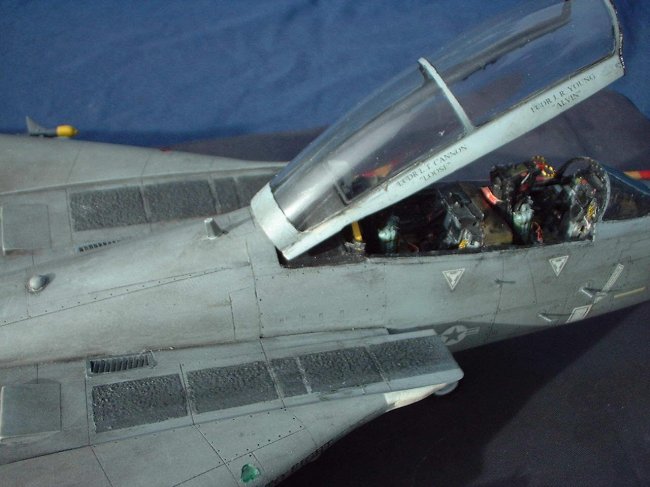
F-14 like the A-6 has a tinted front windshield that is a greenish blue. On my
first try at this (with the A-6) I used Tamyia clear green and blue which I was
not satisfied with, this time I found a better way. I posted a message on
Hyperscale's plane talking and received a great idea, add some food coloring (a
small drop) to future and apply. It took a few tries to get the correct tint,
but in the end it looks great, very subtle, just like the real thing, not too
green as I have seen on other peoples models (no offense).
| Click on images below to
see larger images |
 |
 |
 |
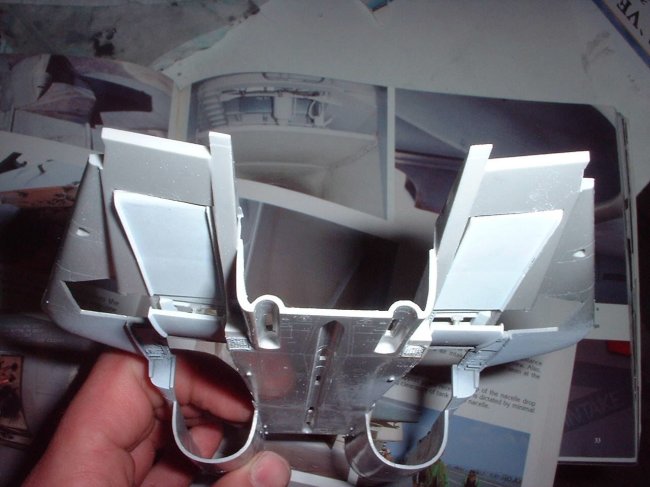
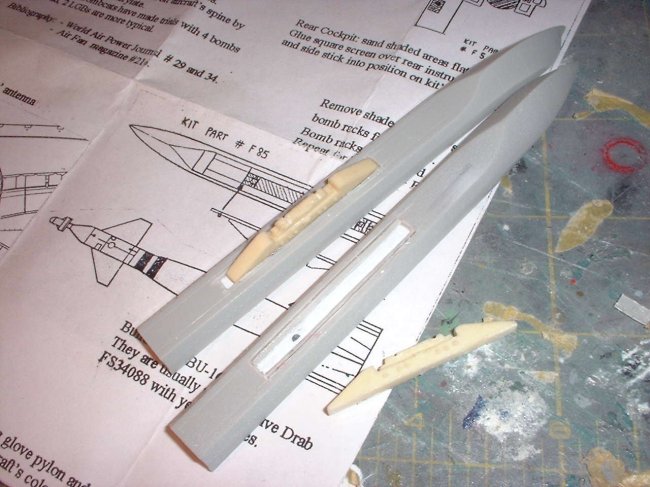
Construction of the upper and lower rear fuselage
was simple (except I lost the panel line of the wing glove vane that I had to
re-scribe). I also assembled the wings at this time and made a few corrections
to them (missing actuators). It has been said many times that the wings need to
be updated by Hasegawa since building them flaps and slats down is a problem
because of missing parts, luckily I was doing mine with the wings swept since it
will be parked on deck.
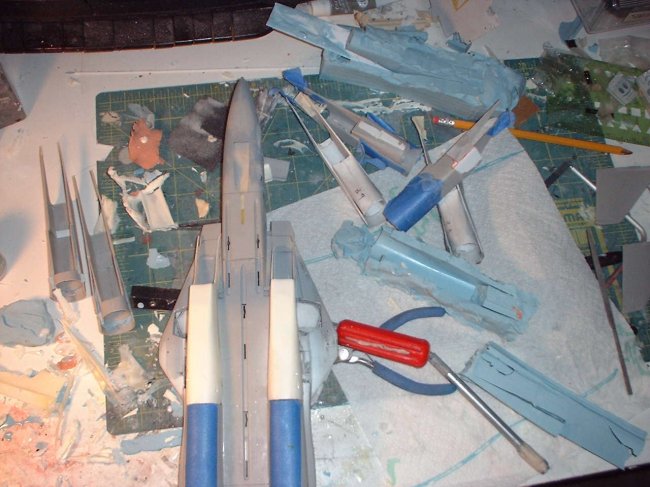
My biggest problem was the intakes, let's just say it was a
nightmare that kept getting worse and worse and I wanted to smash everything in
a million pieces. My first mistake was trying to sand the inside into a seamless
joint, trust me it can't be done! The intakes are made up of four parts each,
upper and lower intake tubes, the main outer part with the other half of the
inside, and the turbine face. The problem is when you join the tube to the main
part, you have a large gap inside the intake trunking and you are tempted to
fill it and sand it smooth, it's the sanding part that got me. During sanding I
found that the plastic is very brittle and cracks and shatters under the stress
of sanding, I would fix each crack and hole with super glue and then when
smoothing it, a new crack would start, and so on, and so on. I had decided to
order two more F-14 kits from Japan around this time (the yen was down and they
were half price) so I decided to
just start over with a new set and copy the parts in resin. I then did as much
work on the rest of the kit as I could in the meantime, building up the exhaust,
the vertical stabilizers, the weapons, etc.
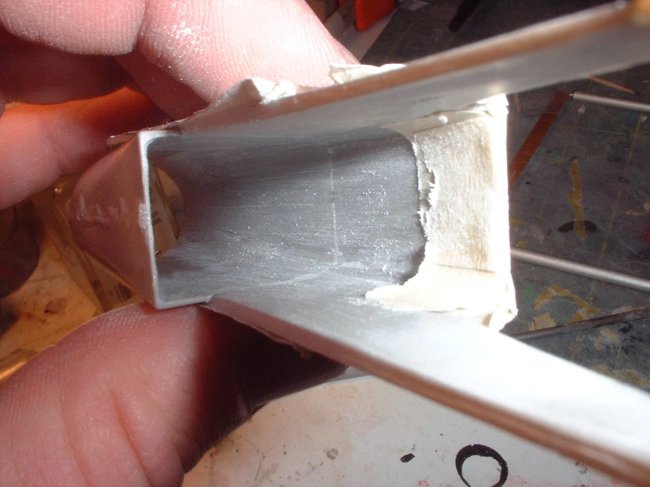
A month
latter I started again with the parts from the new kits and although I thought I
was being more careful, I again destroyed them (although not as bad) mostly
because the area near the intake lip is so thin and likes to crack. I was about
to give up, when I decided to use my third and last set with the seam roughly
filled (if you look in there you will see it, but it's not that bad) and copy
those. I had only copied small parts in resin before, and this would be new
ground for me. I found it is very hard to copy a long, large, hollow part, and
went through about $50-$60 worth of RTV silicon rubber trying to cast it. I
found the only way to do it was to cut off the top of the intake trunk (that
tube part) and cast that separately and then glue it on later (yes I know
another seam, but I stopped caring by this point). Well after about two to three
months I succeeded in
making a usable intake, and was just happy to move on. Unfortunately that
wasn't the end of it, I had some big gaps and cracks when joining them to the
lower fuselage but I manage to fix most of them (the other problems were in the
tunnel so I didn't fret too much about them) although the most foreword part of
the intake kept cracking during painting, requiring a lot of touch up.
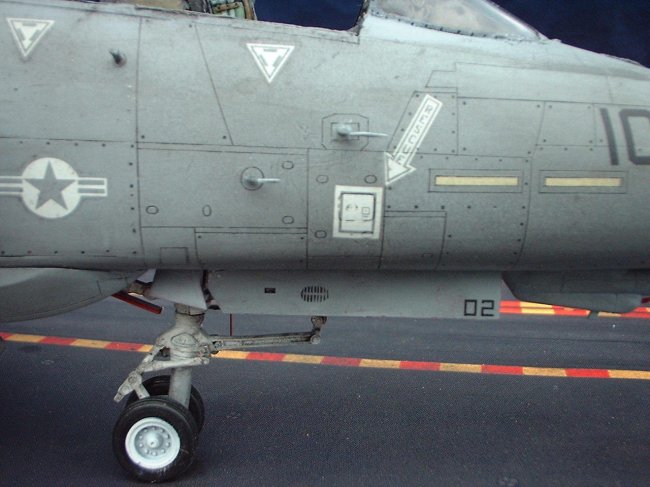
On the Bombcat there is also an antenna (I think it's
an ECM antenna) added to the nose gear door, I had to add this and modify the
door. The small vent is relocated to the rear, I had to cut and shift around the
door and reglue, then I made the antenna from a chunk of sprue again glued onto
a piece of card which I then drilled rivet holes into. I also added a box and
wiring behind it using reference photos.
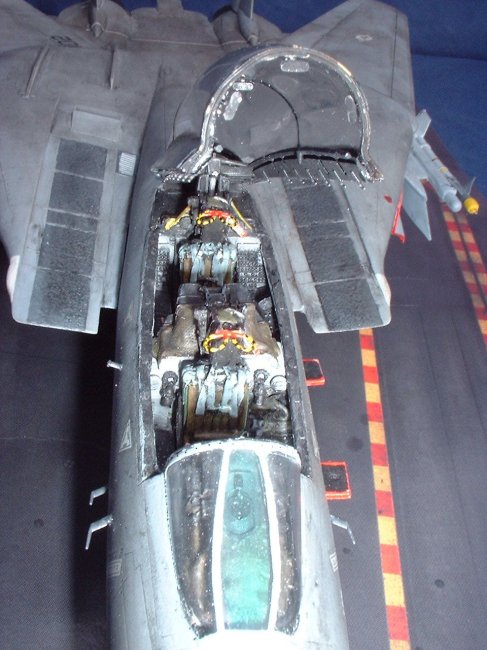
On the Bombcat there is a small dome shaped GPS antenna
on the spine behind the cockpit (it is for the Lantrin's embedded GPS Nav
system), it needs to be scratchbuilt. I scratched my head a bit and then
realized I had the part already, the sprue ends on the kit are just the right
size, just round the top out and cut off (use a razor saw). I also put a
small piece of plastic card underneath and cut it closely because on the real
antenna there is a small ring at the base. It was nice of Hasegawa to provide us
with the part, they just forgot to tell us.
 |
 |
 |
| GPS
antenna |
nose-gear
door antenna |
Phoenix
rail corrections |
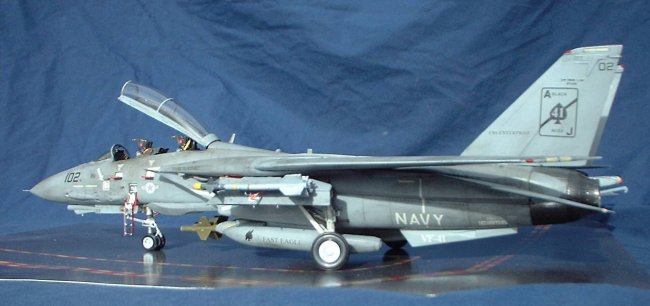
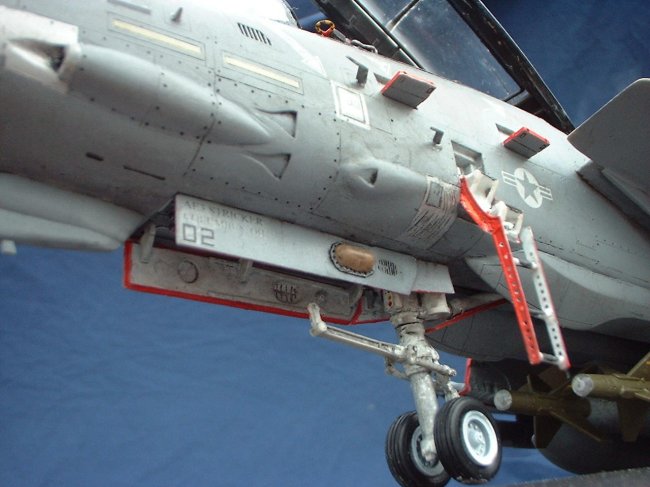
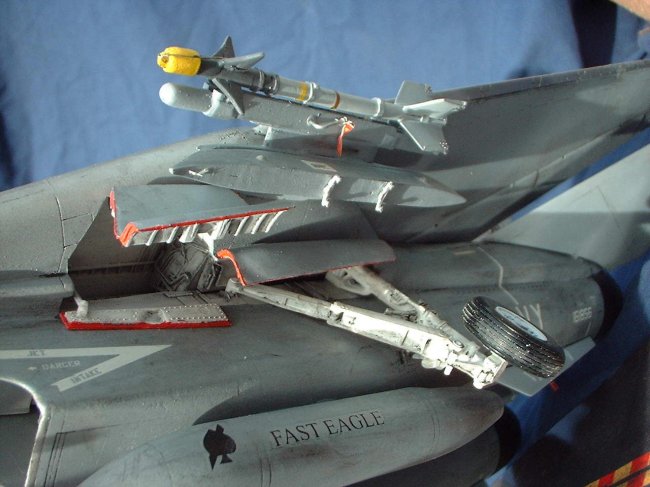
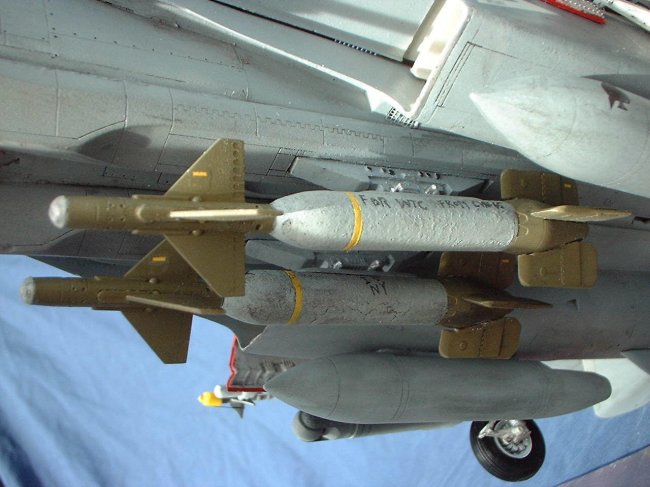
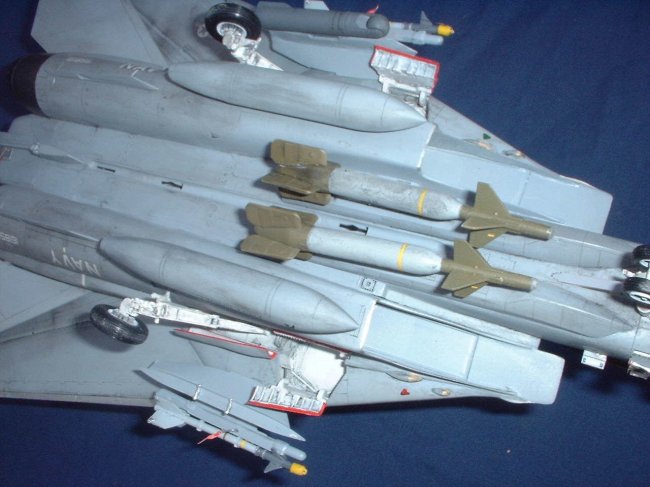
Back to the weapons, to
make a bombcat you will need to add a few things to the kit, the LANTRIN pod and
pylon, the bomb racks for the Phoenix rails, and if necessary the BOL sidewinder
rails (depends aircraft to aircraft). On the Phoenix rail there are two small
bumps that I added using some chunks of sprue again, and then latter some
stenciling was added. My kit already came with the BOL winder rails in
resin (It was the "Black Knights Millennium Special" issue) but I
needed the other parts. By the way Hasegawa includes all the right parts
in the "F-14A Lantrin" issue, I wished I had gotten that kit instead.
Next I used my Hasegawa Guided weapons set to provide the Lantrin pod and the
Laser Guided Bombs.
Lastly I used the Eagle Design
resin conversion set for the bomb racks and Lantrin pylon. If you ever build a
modern Navy jet with bombs, you must remember that they have ablative (fire
proof) coating that gives the bombs a rough texture, I of course had to modify
my Hasegawa LGBs to show this. It was a simple method of using 3M adhesive and
Baby powder to create this, I used this same method for the wing walks as well
(as I did on my A-6E). I also used some sidewinders from a Revell kit, that I
modified by drilling the holes for the proximity fuse.
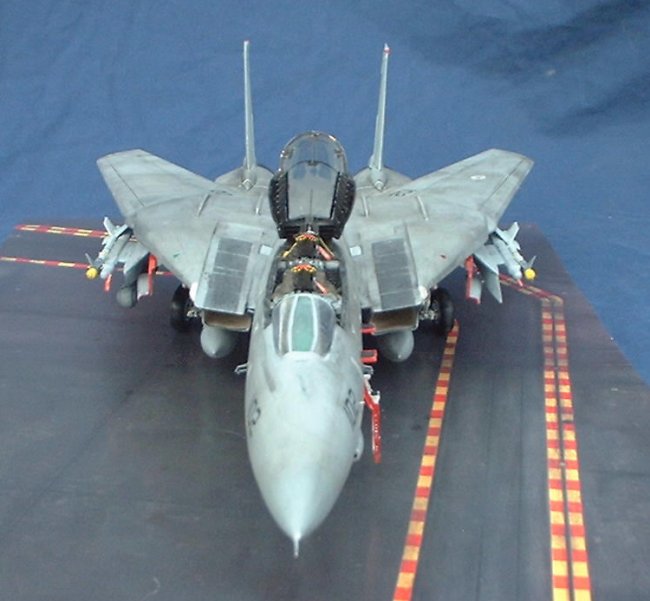
Next I
painted the plane using Testor's MM Dark Ghost Grey overall and then weathered
it using chalk pastel sludge (powder mixed with water and soap). I went to town
on the weathering after studying several photographs of the VF-41 Tomcats, as
they got very dirty during the cruise (mostly the upper surfaces because people
would walk around on them), the most recent photos in International Airpower
Review really show this well. But I found that as soon as I started to decal on
top of it (the grey stencils not the black decals), I found I had darkened the
overall paint job a little too much as the decals almost looked white on top of
the weathering, so I added a little more weathering over them, but they were
still too white. In the end I decided there was nothing I could do about,
and they don't look so bad, I did tell Armagan at CAM about it as well and he
said they went off of FS numbers for it, and I think all my weathering probably
darkened the base paint too much.
When decaling I tried a
technique that Ted Taylor had recently talked about online, after gloss coating
with future I used some very fine sandpaper (12,000 grit) to smooth the areas I
was decaling over even more, since nothing silvered I guess it worked. On the
subject of Decaling I had to make one of my own, a first for me, and it was
easy. CAM's decals were dated 2000, and where missing one thing that was applied
to the tail for the 2001 cruise, a small stencil saying "Last Tomcat Cruise
1976-2001" because right after the return from Afghanistan the aircraft
where sent to mothballs at ARMARC, so this was a historical cruise even
without the strikes that they flew. To make the decals I made a large master of
the words using MS Paint and then I used a photocopier to reduce it the right
size, then taped a piece of blank decal paper on to the paper (over the copy to
ensure the right placement) and copied again and after it had dried I applied
some micro-sol liquid decal film over it. The reason I started with a large size
font was if I print a smaller font, the curves are jagged (printers print one
line at a time) so when you use a photocopier you you can reduce it to a very
small size and maintain the shape of the letters. I was nervous applying them
but they went on just like all the other decals and in the end you can't even
tell which are CAM's and which are mine.
With all of that done I could begin adding the "fiddilly
parts" from the landing gear doors to the bombs to the PE ladder to the
exhaust nozzles to the canopy. After I was almost done I realized I had
forgotten the pitot tube on the nose, Dhooo! I realized that this part would
break off very easily if I used the plastic kit part (which was crude anyways)
so I decided to fashion one using a metal sewing needle for strength. I tried to
taper the tip as the real one would be, but after I was unsuccessful I just went
ahead with it as is. I simply glued it in with superglue and built up the nose
join using more superglue around it, and then sanded the area smooth and
repainted the area. I also added the windshield rain removal vents with three
small pieces of plastic tubing, and the yaw string (it really is a piece of
string on the real plane) with some sewing thread
inserted into a small hole and painted gray to match. On the windscreen I
added small dots with a very fine tipped marker to represent the rivets/screws
found on the real plane. Almost done now, one last step though, I had some
Remove Before Flight tags from Verlindin that I wanted to try (first time use).
I found that they were pretty easy to use and sure dressed up the plane, I added
them to the cockpit and ejection seats (should have done it before I glued on
the canopy) in the spots where they safed the ejection system. I also added one
to the tail hook area (I think it safes the chaff/flare ejector) and I fashioned
the sidewinder wrench/safety pin from florist wire and a RBF tag each. I also
made the sidewinder seeker head caps from some plastic tubing that was cut and
capped off with a piece of plastic sheet sticking out which I drilled
for the wire that holds it on (I think it's really a bungie cord that goes
around the nose fin on the real thing).
I had planned to build a carrier diorama base (I have PE tie
down stars) and show the Pilot and RIO stopping to sign a Sept. 11th message on
a bomb (I was going to make a bomb hand truck) that ordies were wheeling
by, but after a five month struggle I felt it can wait. I will still build this
at a latter date since I want to give the plane the correct historical setting,
and will send you all some pictures then. Right now I have to get back to
my A-4 projects starting with the TA-4J and as soon as Cutting Edge releases the
A-4M conversions I will build the A-4AR. It feels good to be done with this
beast, and although it was though it was worth it. This kit has a
reputation for a reason, but don't let that stop you, give it a try. I already
can't wait to build my F-14B (VF-102 Diamondbacks) and my F-14D (VF-213 Black
Lions) both as Op Enduring Freedom aircraft. Hope you all like it, next up a fun
build of a 1/72nd F-18A in Two Bobs Aggressor paint job. Happy modeling :)
Everett
References
F-14 Tomcat by Airtime Publishing
International Airpower Review Vol 3
F-14 Walk Around by Squadron
F-14 Lock On by Verlindin
http://www.navy.mil/
http://www.news.navy.mil/index.asp
http://www.anft.net/f-14/
|
Click on images below to
see larger images |
 |
 |
|
|